
If you want to add new features to your object, for example the serial number, information about the warranty or the condition, attach an invoice, etc., you can easily create new fields.
Note: You already know how to create new fields and would like to know how you can edit your existing fields? Then click here please.
That's how creating new field works:
- Navigate to the Settings tab
- Click on Field definition (objects)
- Click on Create Field
- Choose the desired field type
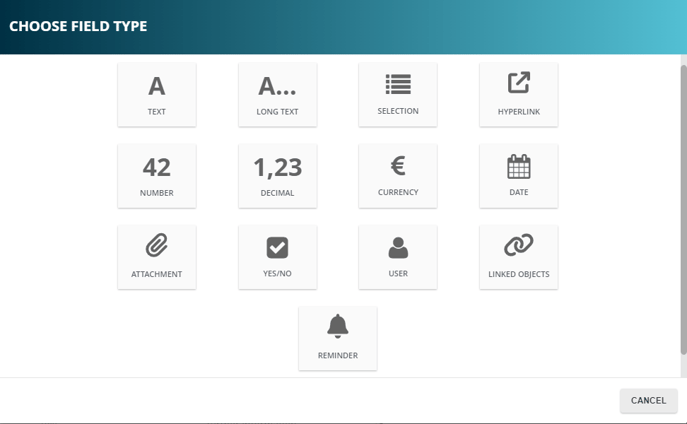
- Text and Long Text is meant e.g. descriptions of objects, manufactor information or a serial number. The only difference is the amount of signs.
- Selection: is a Dropdown field. You can e.g use it for the state of the object ("New", "to be scrapped" etc.) or different inventory groups or co-worker/employees.
- a more in depth explanation on the selvetion field can be found here
- Hyperlink: here you can add a link to e.g. a manucatturer of the objects or the website
- Number: e.g. the year of manufacture or non-alphanumeric object numbers
- Decimal: square measures
- Currency: used for e.g the purchasing price of the object.
- Date: eg. used for the date of the purchase
- Attachement: for any files regarding the object: pictures, protocols or pdf, words etc.
- Yes/No: eg. for marking it extern or not
- User: this field generates a list from all users created in seventhings.
- More information can be found here.
- Linked objects: to link two or more objects.
- Here you can find more information.
- Reminder: to get an e-mail if warranties are due or before the next inspection day
- More infos here
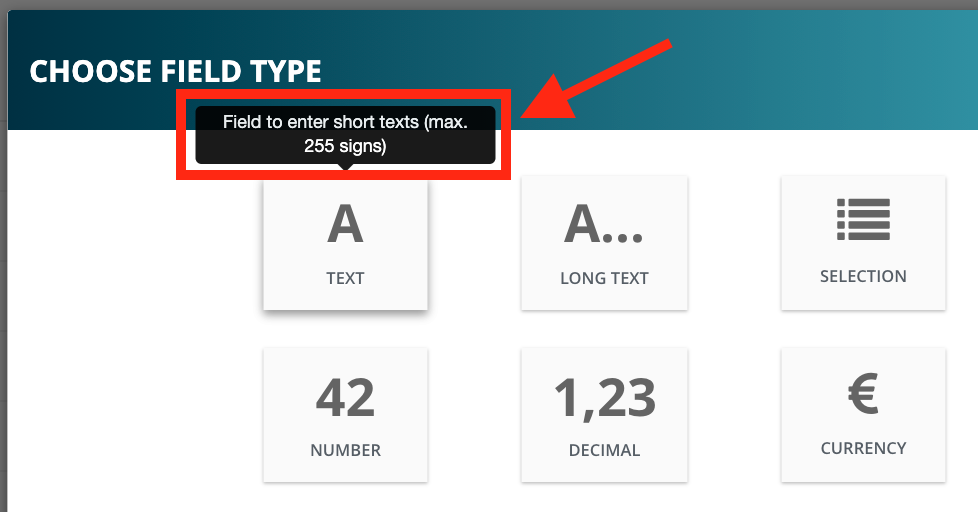
Note: To find out more about the respective field types (such as text, dropdown, date), move the mouse over a field. A mouse-over will appear in which you will then find a brief explanation of each field type.
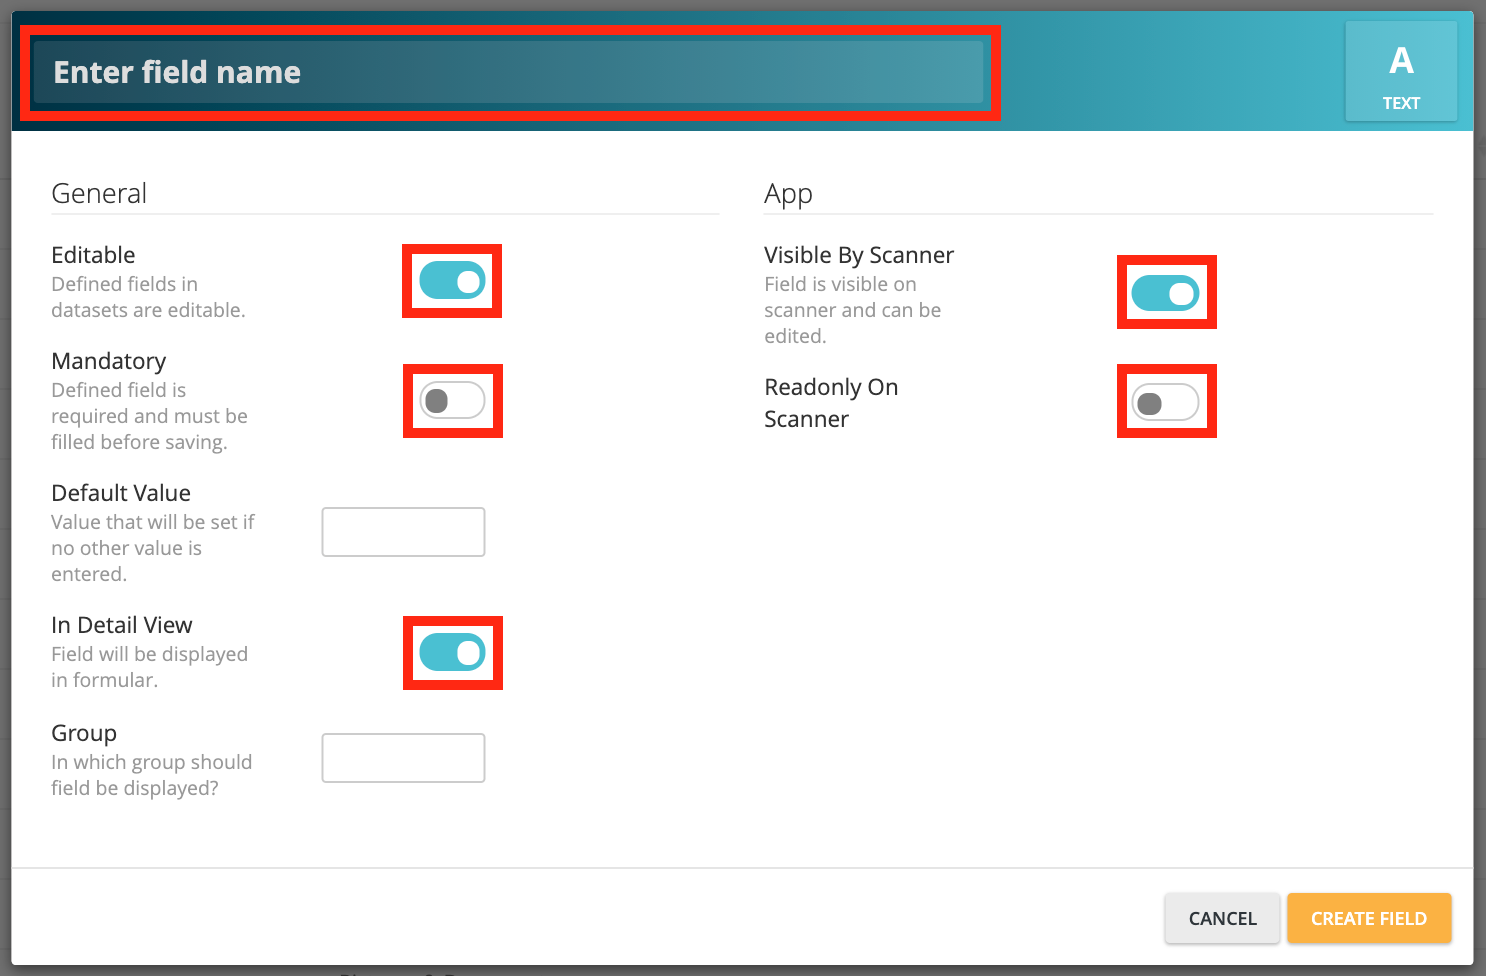
- Give the field a field name and set any options you want
Note:
You can choose from the following on / off fields:
- whether the field should also be visible in the app or only in the inventory manager. Accordingly, select your option under 'App' -> 'Visible in app'.
- whether the field should be editable on the scanner or in the app, then leave the option 'Read-only on scanner' deactivated
- whether the field should remain editable in the future. To do this, select your option under 'General' -> 'Editable'.
- whether it should be a mandatory field
- whether the field should be displayed in the detailed view of the inventory manager. Click here and we will show you where you can find the detailed view of your objects.
In addition, you can:
- optionally assign a standard value to save time when adding new items to seventhings, e.g. for larger purchases.
- assign the field to a group (e.g. a separate group for 'Documents')
- The respective fields of this group appear together in the detailed view of the object. Here we will show you exactly how this looks and how groups help you to keep the perfect overview of your objects.
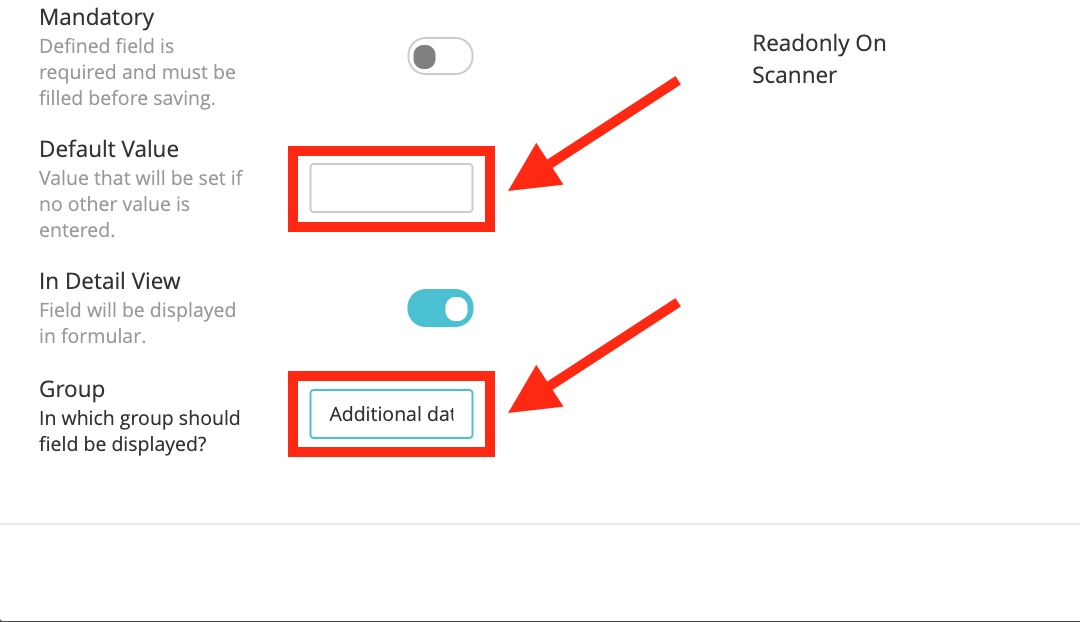
- additionally you can choose if the field should be included in the full textsearch or not.
- Save your entries by clicking on the Update.